How to Install eSIM
Follow these simple steps to install your eSIM on your Apple or Android device
Open Settings
Go to your iPhone's Settings app and tap on the Settings icon.
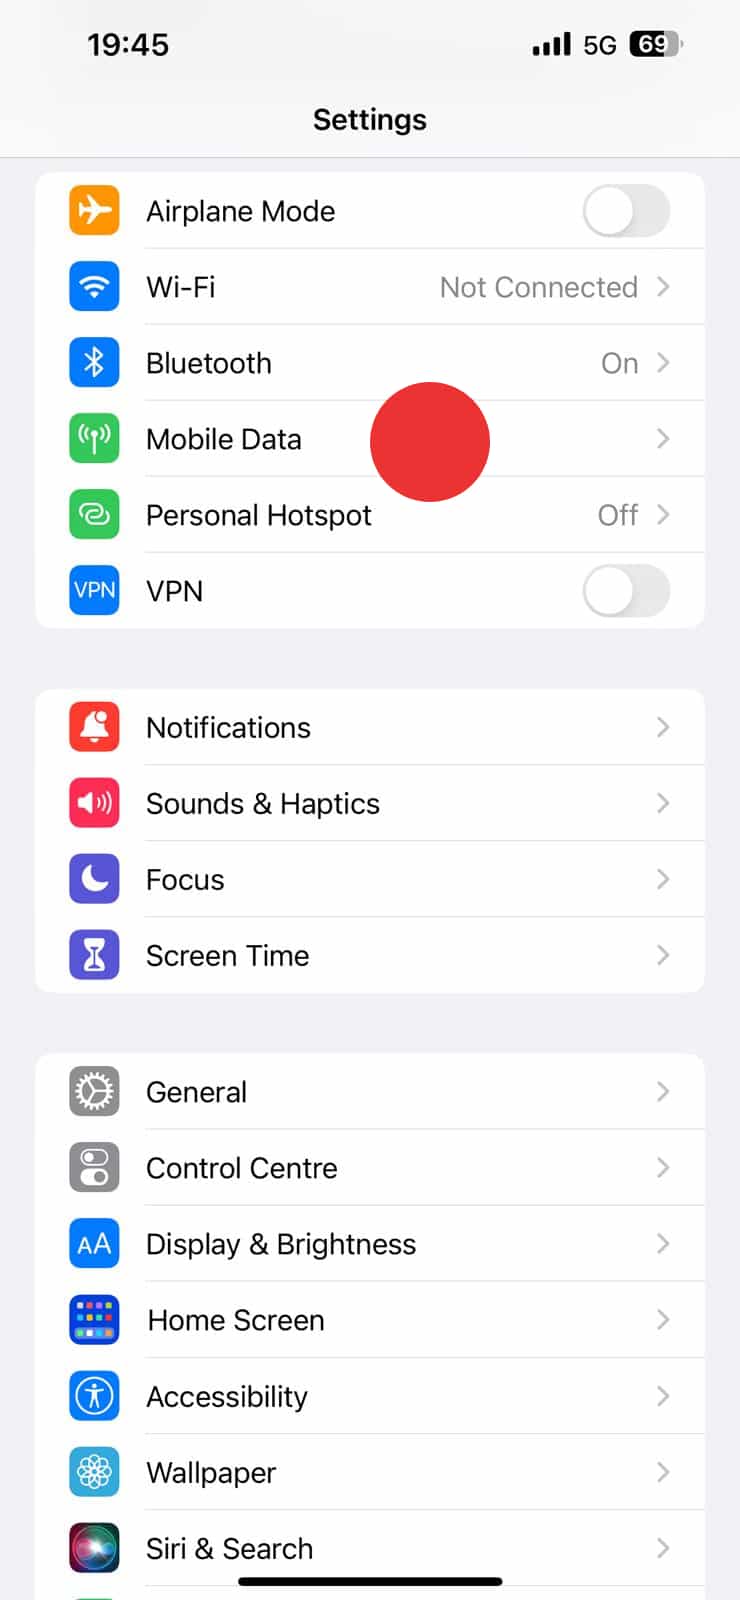
Select Cellular
Scroll down and tap on "Cellular" or "Mobile Data" in the Settings menu.
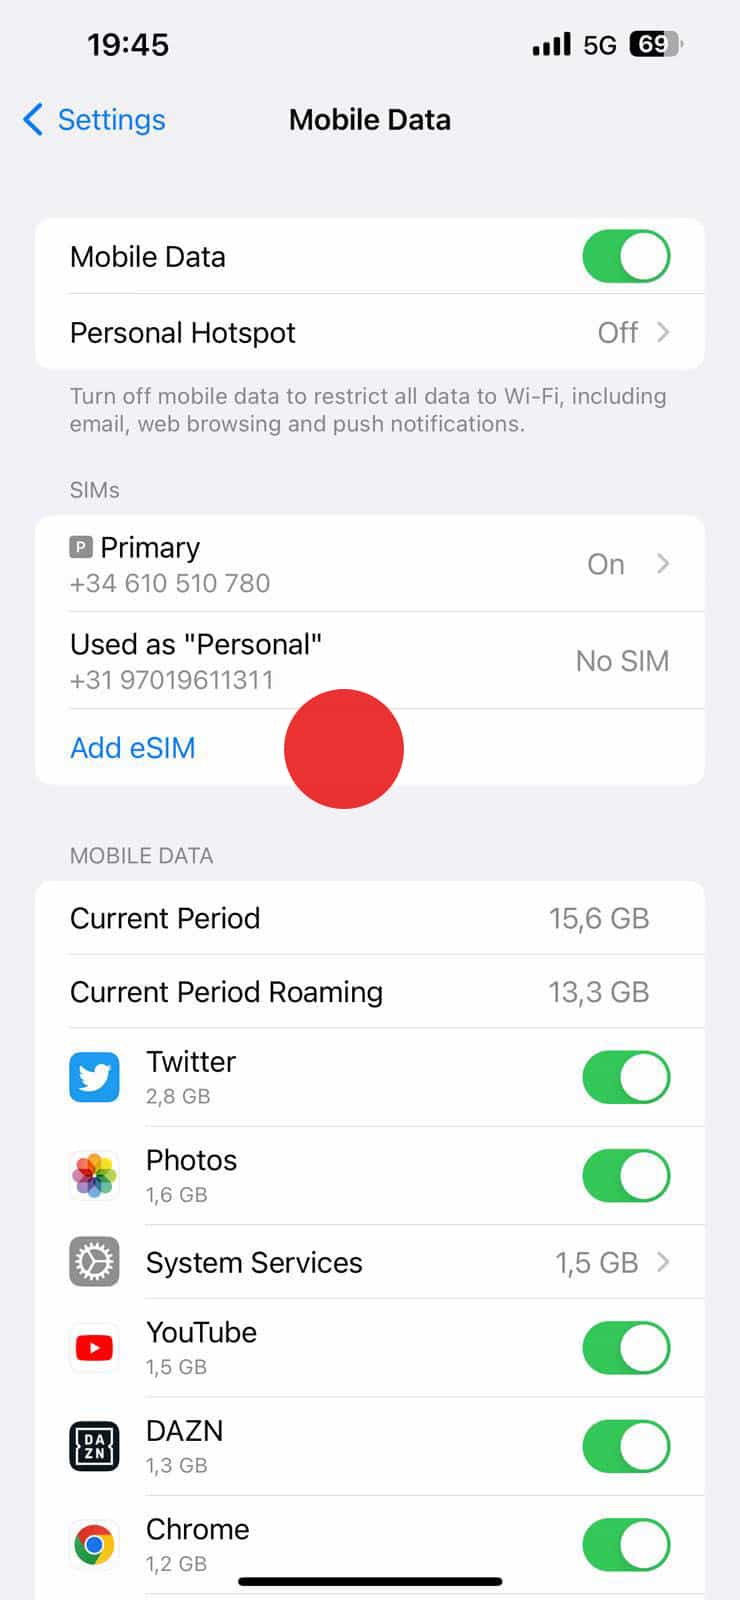
Add Cellular Plan
Tap on "Add Cellular Plan" or "Add Data Plan" option.
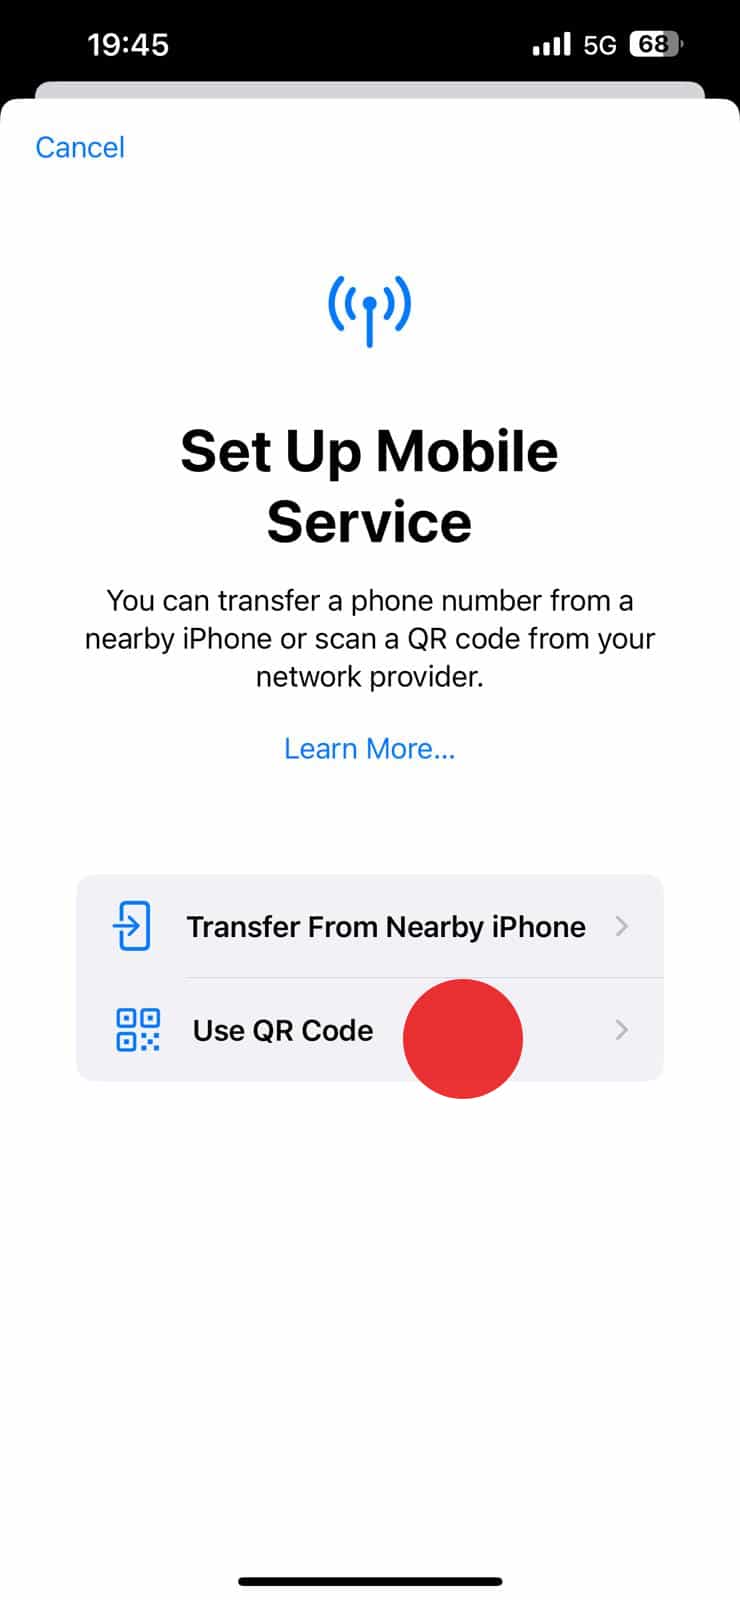
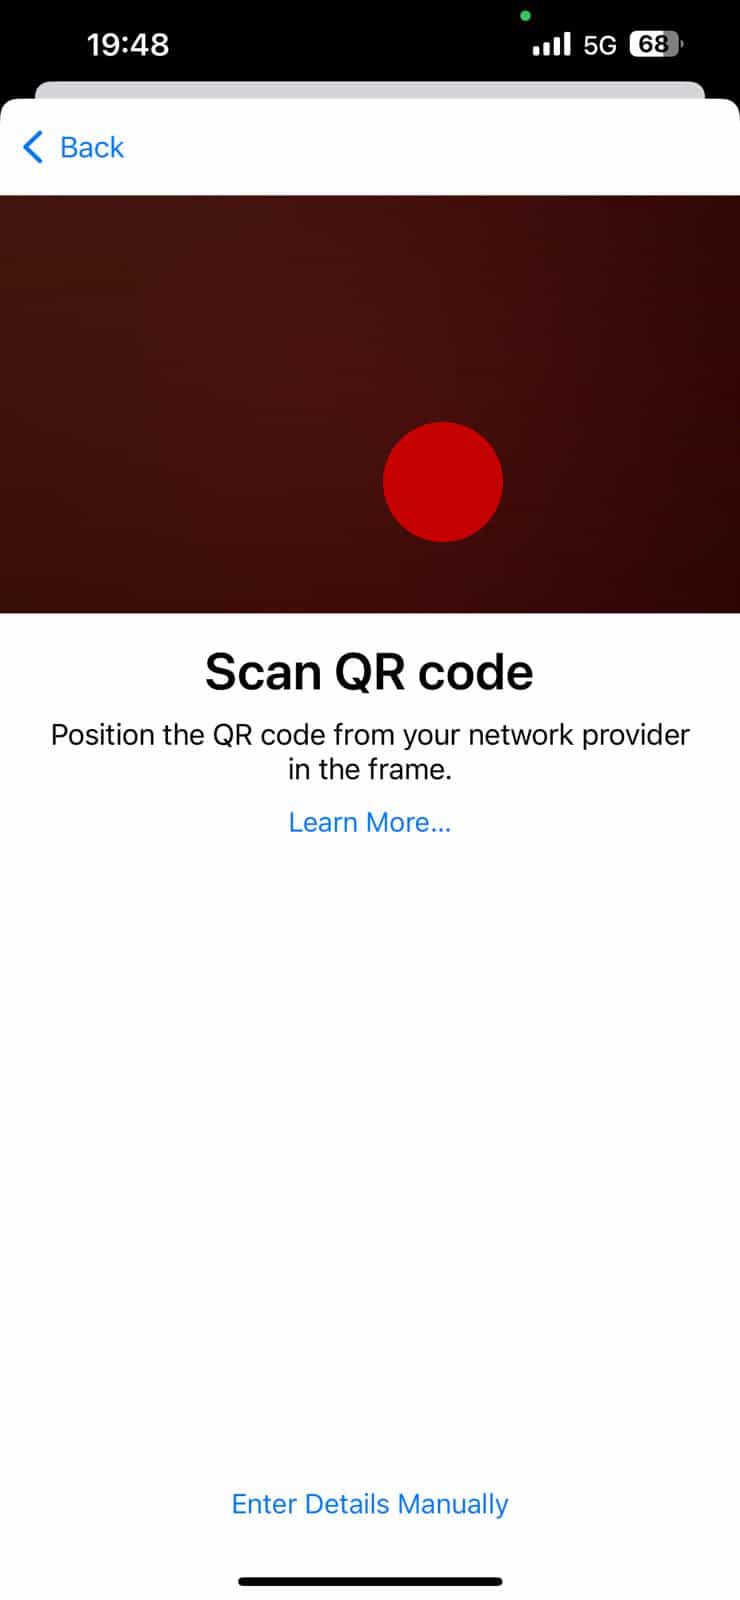
Scan QR Code
Use your camera to scan the QR code provided in your eSIM activation email.
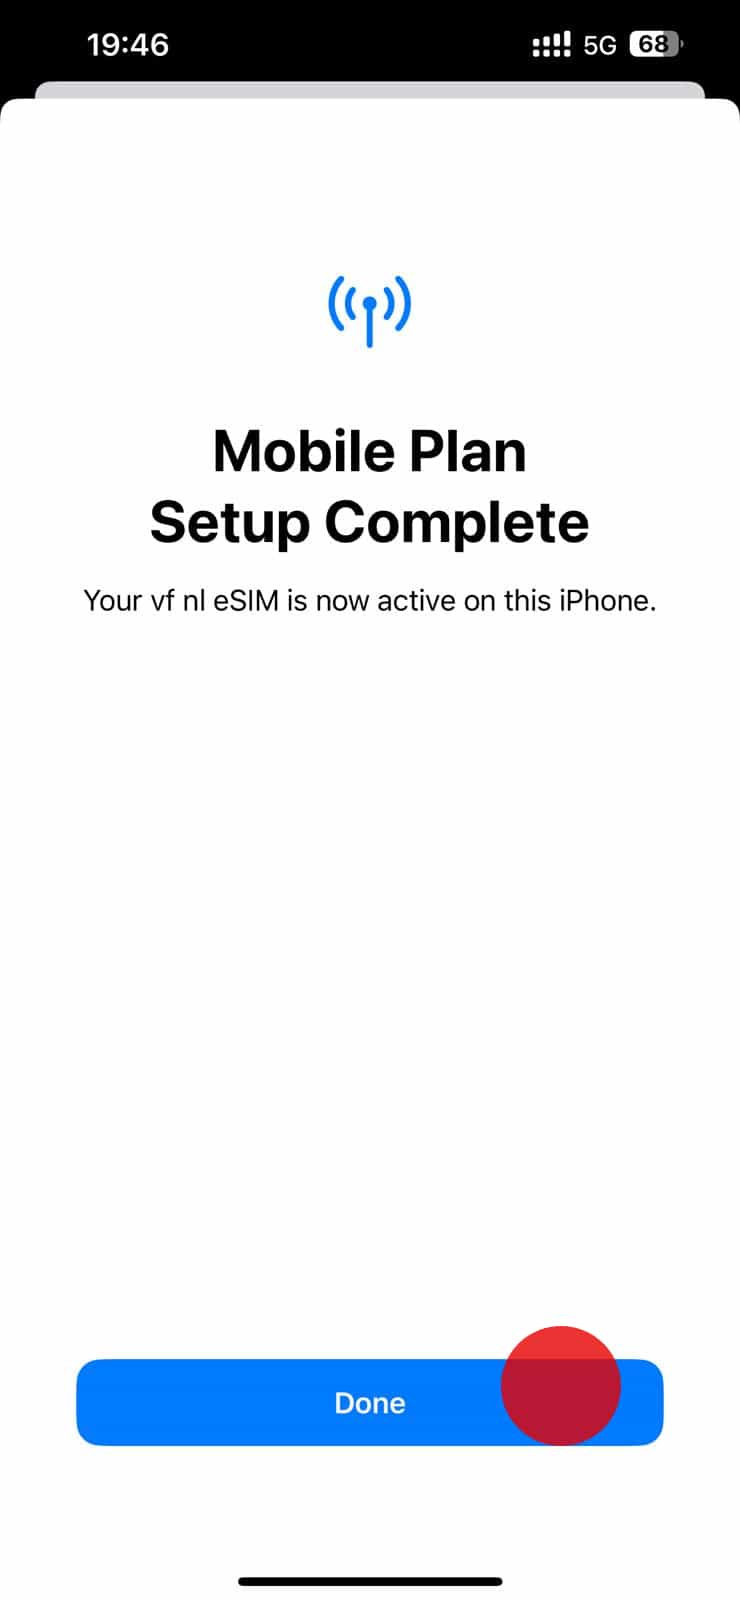
Confirm Installation
Review the plan details and tap "Add Cellular Plan" to confirm.
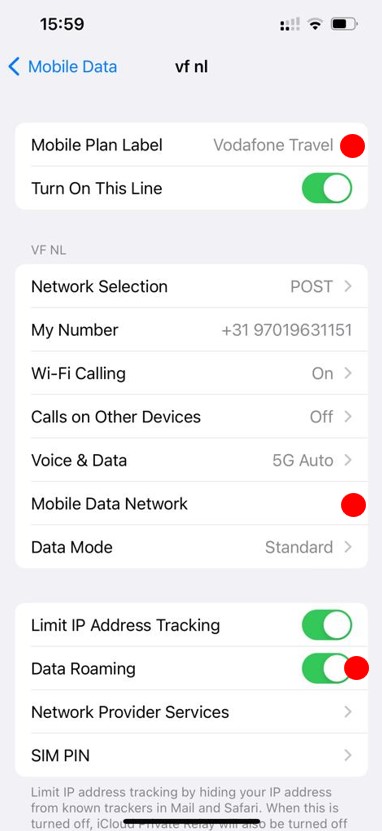
Enable Data Roaming
Go back to Cellular settings and make sure Data Roaming is turned ON for your new eSIM.
Important Notes for iOS:
- Make sure your device is connected to Wi-Fi during installation
- iOS 12.1 or later is required for eSIM support
- Keep your physical SIM card as backup until eSIM is activated
- Contact support if you encounter any issues during installation
Open Settings
Go to your Android device's Settings app and look for Network & Internet or Connections.

Select SIM & Network
Tap on "SIM cards" or "SIM card manager" in the Network settings.

Add eSIM
Select "Add eSIM" or "Download eSIM" option from the SIM manager.

Scan QR Code
Use your camera to scan the QR code from your eSIM activation email or enter the activation code manually.

Download Profile
Wait for the eSIM profile to download and install on your device.

Set as Default
Choose your new eSIM as the default for calls, texts, and data, or set it as secondary.

Important Notes for Android:
- Android 9.0 or later is required for eSIM support
- Not all Android devices support eSIM - check device compatibility first
- Keep your physical SIM card for backup during installation
- Enable Data Roaming in Network settings after installation
- Contact your device manufacturer if eSIM option is not available